Cricket Design Space Remove All White Upload
This post may contain Affiliate Links. Read my full disclosure for more info
I want to share this quick tutorial on how to crop an prototype in Cricut Design Infinite or remove part of an paradigm. This is a super helpful trick to learn and volition really assist yous to sympathize the way some of the tools in design infinite work. So today I am going to show you lot a few ways to remove items from a file and crop images and then you can customize any files to fit your own pattern needs.
Don't forget to check out my library of free SVGs while yous are hither! Search through 300+ SVG cutting files for all occasions, and all gratis to download and use!

Want to larn how to practise other tasks in Design Infinite? Fill out the form below to become my free cheat sheets!
How to Crop an Epitome to Edit the Shape
Outset, we are going to learn how to crop role of an image. This is useful when you want to resize an object. To do this, place an object over the design where y'all desire to crop information technology. Then, select both objects together and click Slice.
**It's important to notation that y'all tin can only slice with 2 layers. If you lot are cropping multiple layers, keep reading as I volition go over this next.

Now that your images are sliced, your design volition look like this.
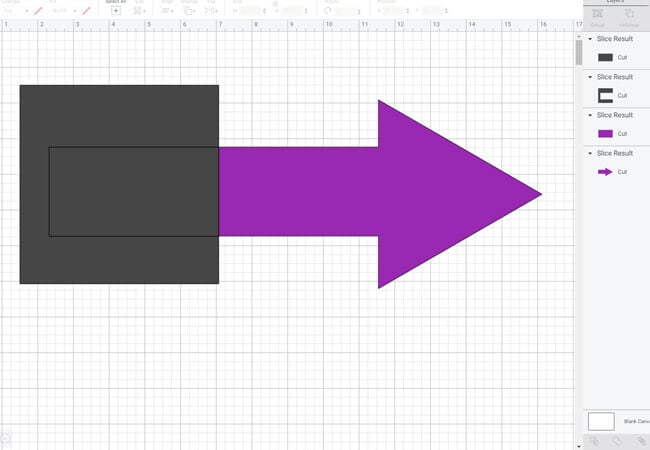
Remove all the extra layers that you don't need and delete them. You have now fabricated your object shorter.

How to Crop an Image When You Have Multiple Layers
If working with multiple images to crop, this gets a footling trickier. You tin weld your images together to slice them together. Just, if you want your images dissimilar colors, you can't weld them together, instead you will have to crop each layer individually. Check out this detailed tutorial on how to use the slice tool for more peachy Cricut Design Space tricks!
Here are the steps to take to ingather a multi-layer object in half:
1. Move the seeds aside.
2. Then, place a square on top of the watermelon where you lot desire to cut the watermelon in half.
3. Select the foursquare and the light-green watermelon rind. Click Piece.
4. Select the square and the watermelon. Click Piece.
5. Remove the sliced pieces you no longer need.

6. Identify a square on top of the seeds where you lot want to ingather.
7. Select the seeds and the square. Click Slice.
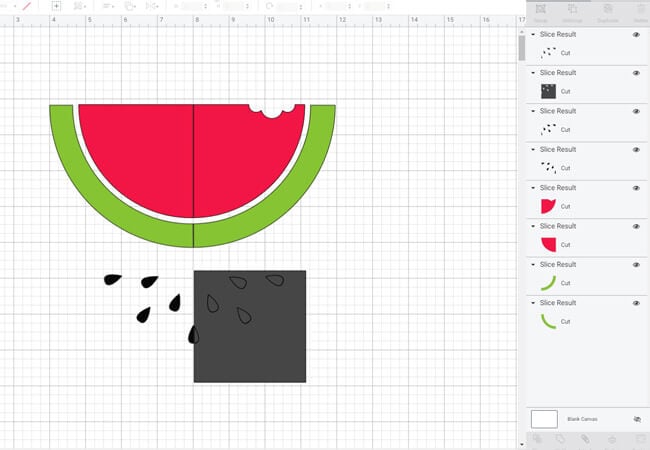
8. Remove the sliced pieces y'all no longer need.
9. Identify the seeds dorsum on the watermelon.
ten. Group the watermelon pieces dorsum together.
You now have 2 slices of watermelon, or you lot tin can delete one slice and you've cropped information technology in half.

How to Utilise Profile to Remove Part of an Image
When you have multiple images on the aforementioned layer and you only wish to remove some objects from the layer, you lot can utilize the Contour tool. Using this free I'yard Two Sweet Birthday svg, which you can download from my complimentary svg library here, I am going to show yous how to remove the text so y'all can use the water ice cream cone to create your own graphic with information technology. Showtime, you volition demand to ungroup the items. To do this, select the graphic and click Ungroup.

At present that the layers are no longer grouped, click on the pinkish layer and click Profile.

This volition open up the Hide Profile window. Click on the objects you lot want to hibernate. When objects are subconscious, they volition turn light grey. When you are finished selecting all the items you lot desire to remove from the epitome, close the window.

The word "Ii" has now been removed. When you remove objects using the Contour tool, they will not cutting when yous send your project to "Make It." But, you can click on contour to add the images dorsum so they are not completely gone.

Next, echo the steps with the green layer.

At present that you have hidden these images using the contour tool, y'all are left with just the water ice cream cone that you tin use to create your ain designs.

How to Plow an Prototype into a Shape
Y'all won't commonly use this fox to change existing svg files. But, this is a cool pull a fast one on and then it's worth adding in here. You can crop an prototype to change the size or information technology, merely y'all tin can as well crop an image to modify the shape. This is corking for making motion picture stickers or picture magnets.
1. Upload a photograph.
2. Then, create a shape (similar a heart) and identify it over the image where you want to crop it.
3. Select both images and slice it.
4. Remove the pieces yous no longer need.
Now you tin cut personalized stickers or magnets!

I promise this was helpful so that y'all can now edit and crop images. If y'all enjoyed this tutorial on cropping images, then make sure to check out all of my Cricut Blueprint Space Tutorials here.
watermanasted1961.blogspot.com
Source: https://svgnation.com/how-to-crop-an-image/
0 Response to "Cricket Design Space Remove All White Upload"
Post a Comment